
A biker vest tells your story before you say a word. Where each patch sits, how many pieces are on the back and how they are attached all matter. This guide covers the usual layout of a biker vest, the difference between 1-, 2- and 3-piece backs, name and officer tags, and the best way to attach patches to a leather vest so they stay put for years of riding.
Plan it in this order: the back first, then the front, then how you will attach everything. Get those three right and your vest will look clean and stay that way.
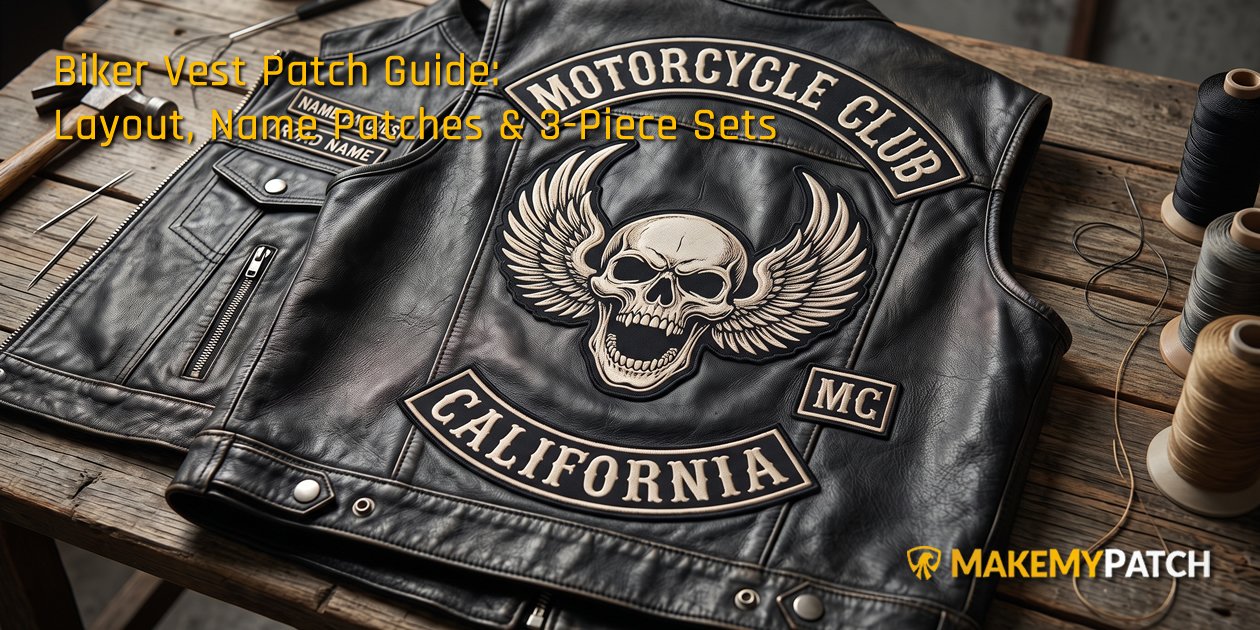
Biker Vest Patch Layout: Where Each Patch Goes
There is no single official chart for every rider. Clubs and riding groups each have their own way of doing things. Still, most vests follow the same basic layout, and knowing it helps you plan your patches before you order.
The back: center patch and rockers
- Center patch: the main design, placed in the middle of the back. On a club vest, this is usually the club logo. On a personal vest, it can be any design that means something to you.
- Top rocker: the curved banner above the center patch. Clubs usually put the club name here.
- Bottom rocker: the curved banner below the center patch. Clubs often use it for a city, state or region.
The curve of the rockers follows the shape of the center patch, so the three pieces read as one unit. When you order a set, ask for all three pieces together so the lettering, colors and curve match.
The front: name tags, officer tags and small patches
- Name tag: usually on the chest, often on the left side. It carries your road name or first name.
- Officer or rank tag: President, VP, Road Captain, Sgt at Arms, Treasurer, Secretary. Usually close to the name tag.
- Small patches: flags, memorial patches, event patches and personal designs go on the front panels, where there is room.
Tip: lay all your patches on the vest and take a photo before anything gets sewn. It is much easier to move a patch on a photo than to unpick stitches in leather.
Biker Patch Sizes: Measure Before You Order
The right size depends on your vest, not on a rule. A center patch that fits a large vest can look lost on a small one, and rockers need to follow the width of the back.
- Measure the flat area of the back panel, from seam to seam, before choosing your center patch size.
- Leave room above and below the center patch for the rockers.
- For the front, measure the space between the zipper or snaps and the armhole.
Not sure? Send us your vest measurements with your design on the free quote form and we will size every piece to fit your vest.
1-Piece, 2-Piece and 3-Piece Sets Explained
The number of pieces on the back is one of the most noticed details on a vest, so it is worth understanding before you order.
| Back layout | What it is | Who usually wears it |
|---|---|---|
| 1-piece | A single back patch, sometimes with the name built into the design | Independent riders, riding clubs, groups, personal designs |
| 2-piece | A center patch with one rocker | Many riding clubs and groups |
| 3-piece | Center patch, top rocker and bottom rocker | Traditionally associated with motorcycle clubs (MCs) |
These are habits, not laws, and they vary by region. If you are not in an MC, ask around before wearing a 3-piece or a state bottom rocker: in many areas they are read as club colors. When in doubt, a 1-piece back patch is the safe choice.
One thing we never do: reproduce the colors of an existing club, or a 1% patch, without an order or approval from that club’s president. Your design should be yours.
What do the patches on a biker vest mean?
Beyond the back, many vests carry patches with their own meaning: memorial patches for fallen riders, event and mileage patches, and patches tied to club roles or traditions. Some of these are earned inside a club and should not be worn by outsiders. If you see a patch you do not understand, ask the rider who wears it rather than copying it.
Name Patches and Officer Tags for Your Club
Name and officer tags are the easiest way to make a vest personal, and the easiest way to make a club look organized. Most clubs order them together: one tag per member, plus President, VP, Road Captain, Sgt at Arms, Treasurer and Secretary.
- Order as a club set: same font, same colors and same border on every tag, so the whole club matches.
- Keep the text short: a road name or a single title reads best from a distance.
- Need just one? That works too. There is no minimum quantity on embroidered patches.
Want ready-to-order options? See our custom patches set for biker vests and our custom embroidered patches for MC vests.
How to Attach Patches to a Leather Vest
This is where most vests go wrong. Leather is not cotton or denim, and the methods that work on a jean jacket do not always work on a leather vest.
Sewing patches on a leather vest by hand
Hand sewing is the most reliable method, and you do not need special skills.
- Position the patch and hold it with clips rather than pins. Pins leave holes in leather that do not close.
- Use a leather needle (also called a glover’s needle). Its triangular point cuts through leather cleanly.
- Use strong thread: heavy nylon or polyester thread holds up to sun, rain and wind.
- Stitch through the border, close to the edge, with small even stitches all the way around.
- Sew through the outer leather only if your vest has a lining you want to keep clean, or open the lining and close it afterward.
Take your time on the back patch and rockers: they carry the most weight and take the most wind.
Sewing patches on with a sewing machine
A machine works if it can handle leather: use a leather needle, a longer stitch length and a slow speed. Many home machines struggle with thick leather plus a thick embroidered patch. If yours does, a leather shop or tailor can do it for you. Our guide on how to machine sew custom patches covers the basics.
Can you iron patches onto a leather vest?
We do not recommend it. Heat can mark or shrink leather, and iron-on adhesive does not grip leather the way it grips cotton or denim. Even if the patch seems to hold at first, it will often start to lift at the edges. On leather, sew. Iron-on works best on fabric jackets and denim (see our tips on keeping iron-on patches from peeling).
Can you glue patches on a leather vest?
Leather or fabric glue is useful to hold a patch in place while you sew it. On its own, glue is not a long-term solution on a vest that sees wind, rain and sun: over time, the edges tend to let go. Use it as a helper, not as the only fix.
Attaching patches without sewing
There is no no-sew method that holds as well as stitching on leather. If you do not want to sew, the best option is to have a leather shop or a shoe repair shop stitch your patches on for you.
For fabric jackets and other garments, our article on 9 ways to apply embroidered patches covers every method.
Biker Vest Patches: FAQ
It is not recommended. Heat can damage leather, and iron-on adhesive does not grip it well. Sew the patch on, or have a leather shop do it.
Sewing through the patch border with a leather needle and strong nylon or polyester thread. It is the most durable method.
Glue can hold a patch in place while you sew it, but glue alone tends to let go over time on a vest worn on the road.
The main design is centered on the back, with a top rocker above and a bottom rocker below. Name and officer tags usually go on the front chest, and smaller patches on the front panels.
Get a Free Quote for Your Vest Patches
Back patch, rockers, name tags or a full club set: send us your design, your vest measurements and the quantity you need. We will come back with a mockup to approve before anything is stitched. Quotes are free, and there is no minimum on embroidered patches.